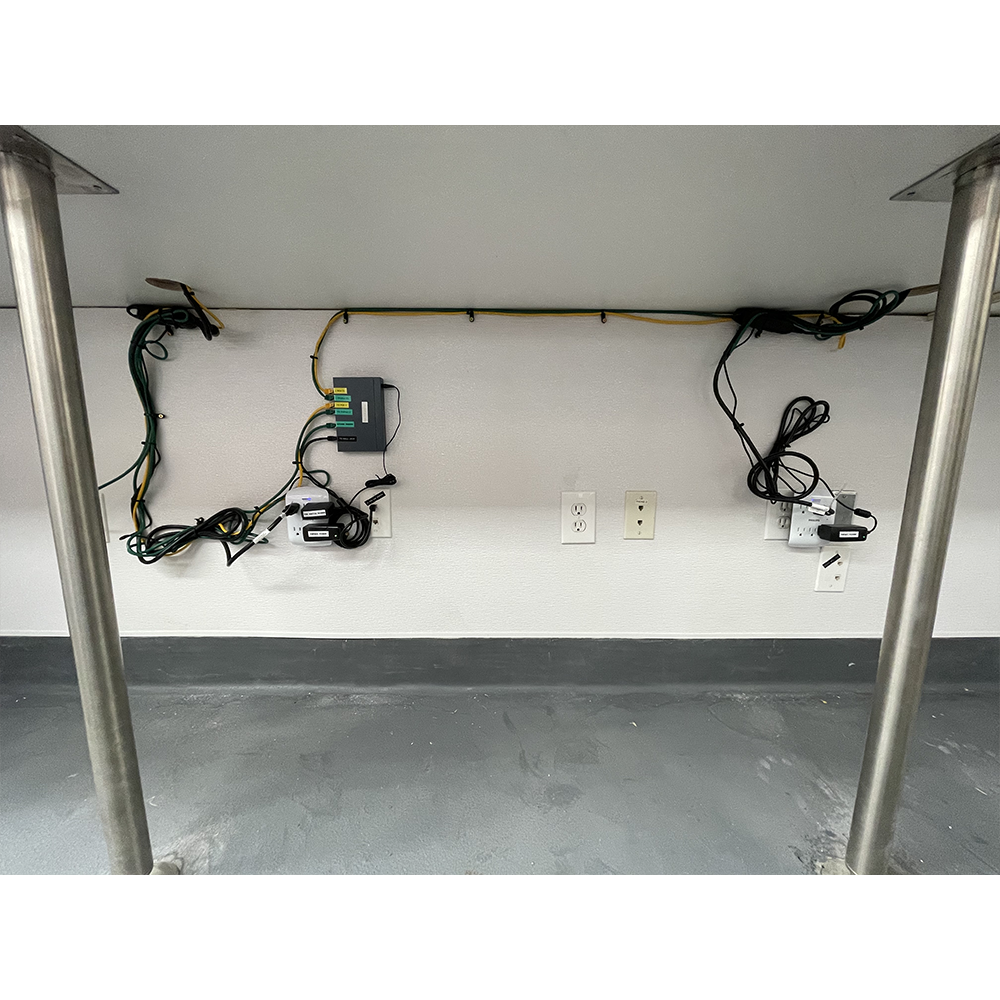
MICROS SYMPHONY NETWORK Map

STEPS TO INSTALL SYMPHONY HARDWAR
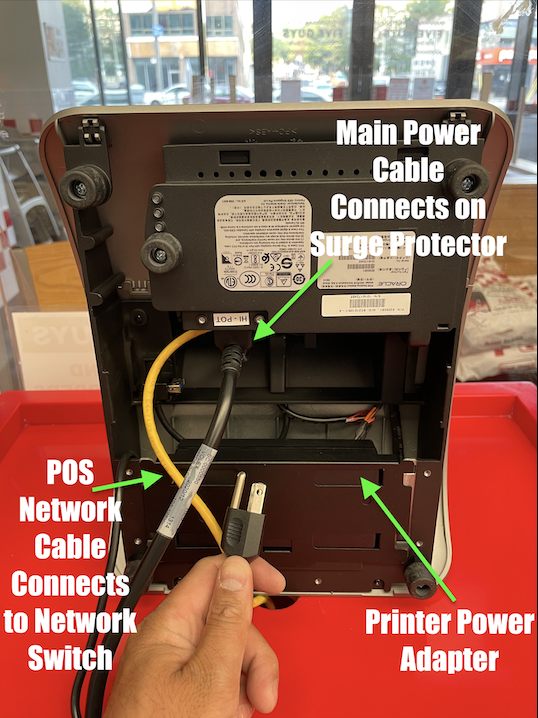
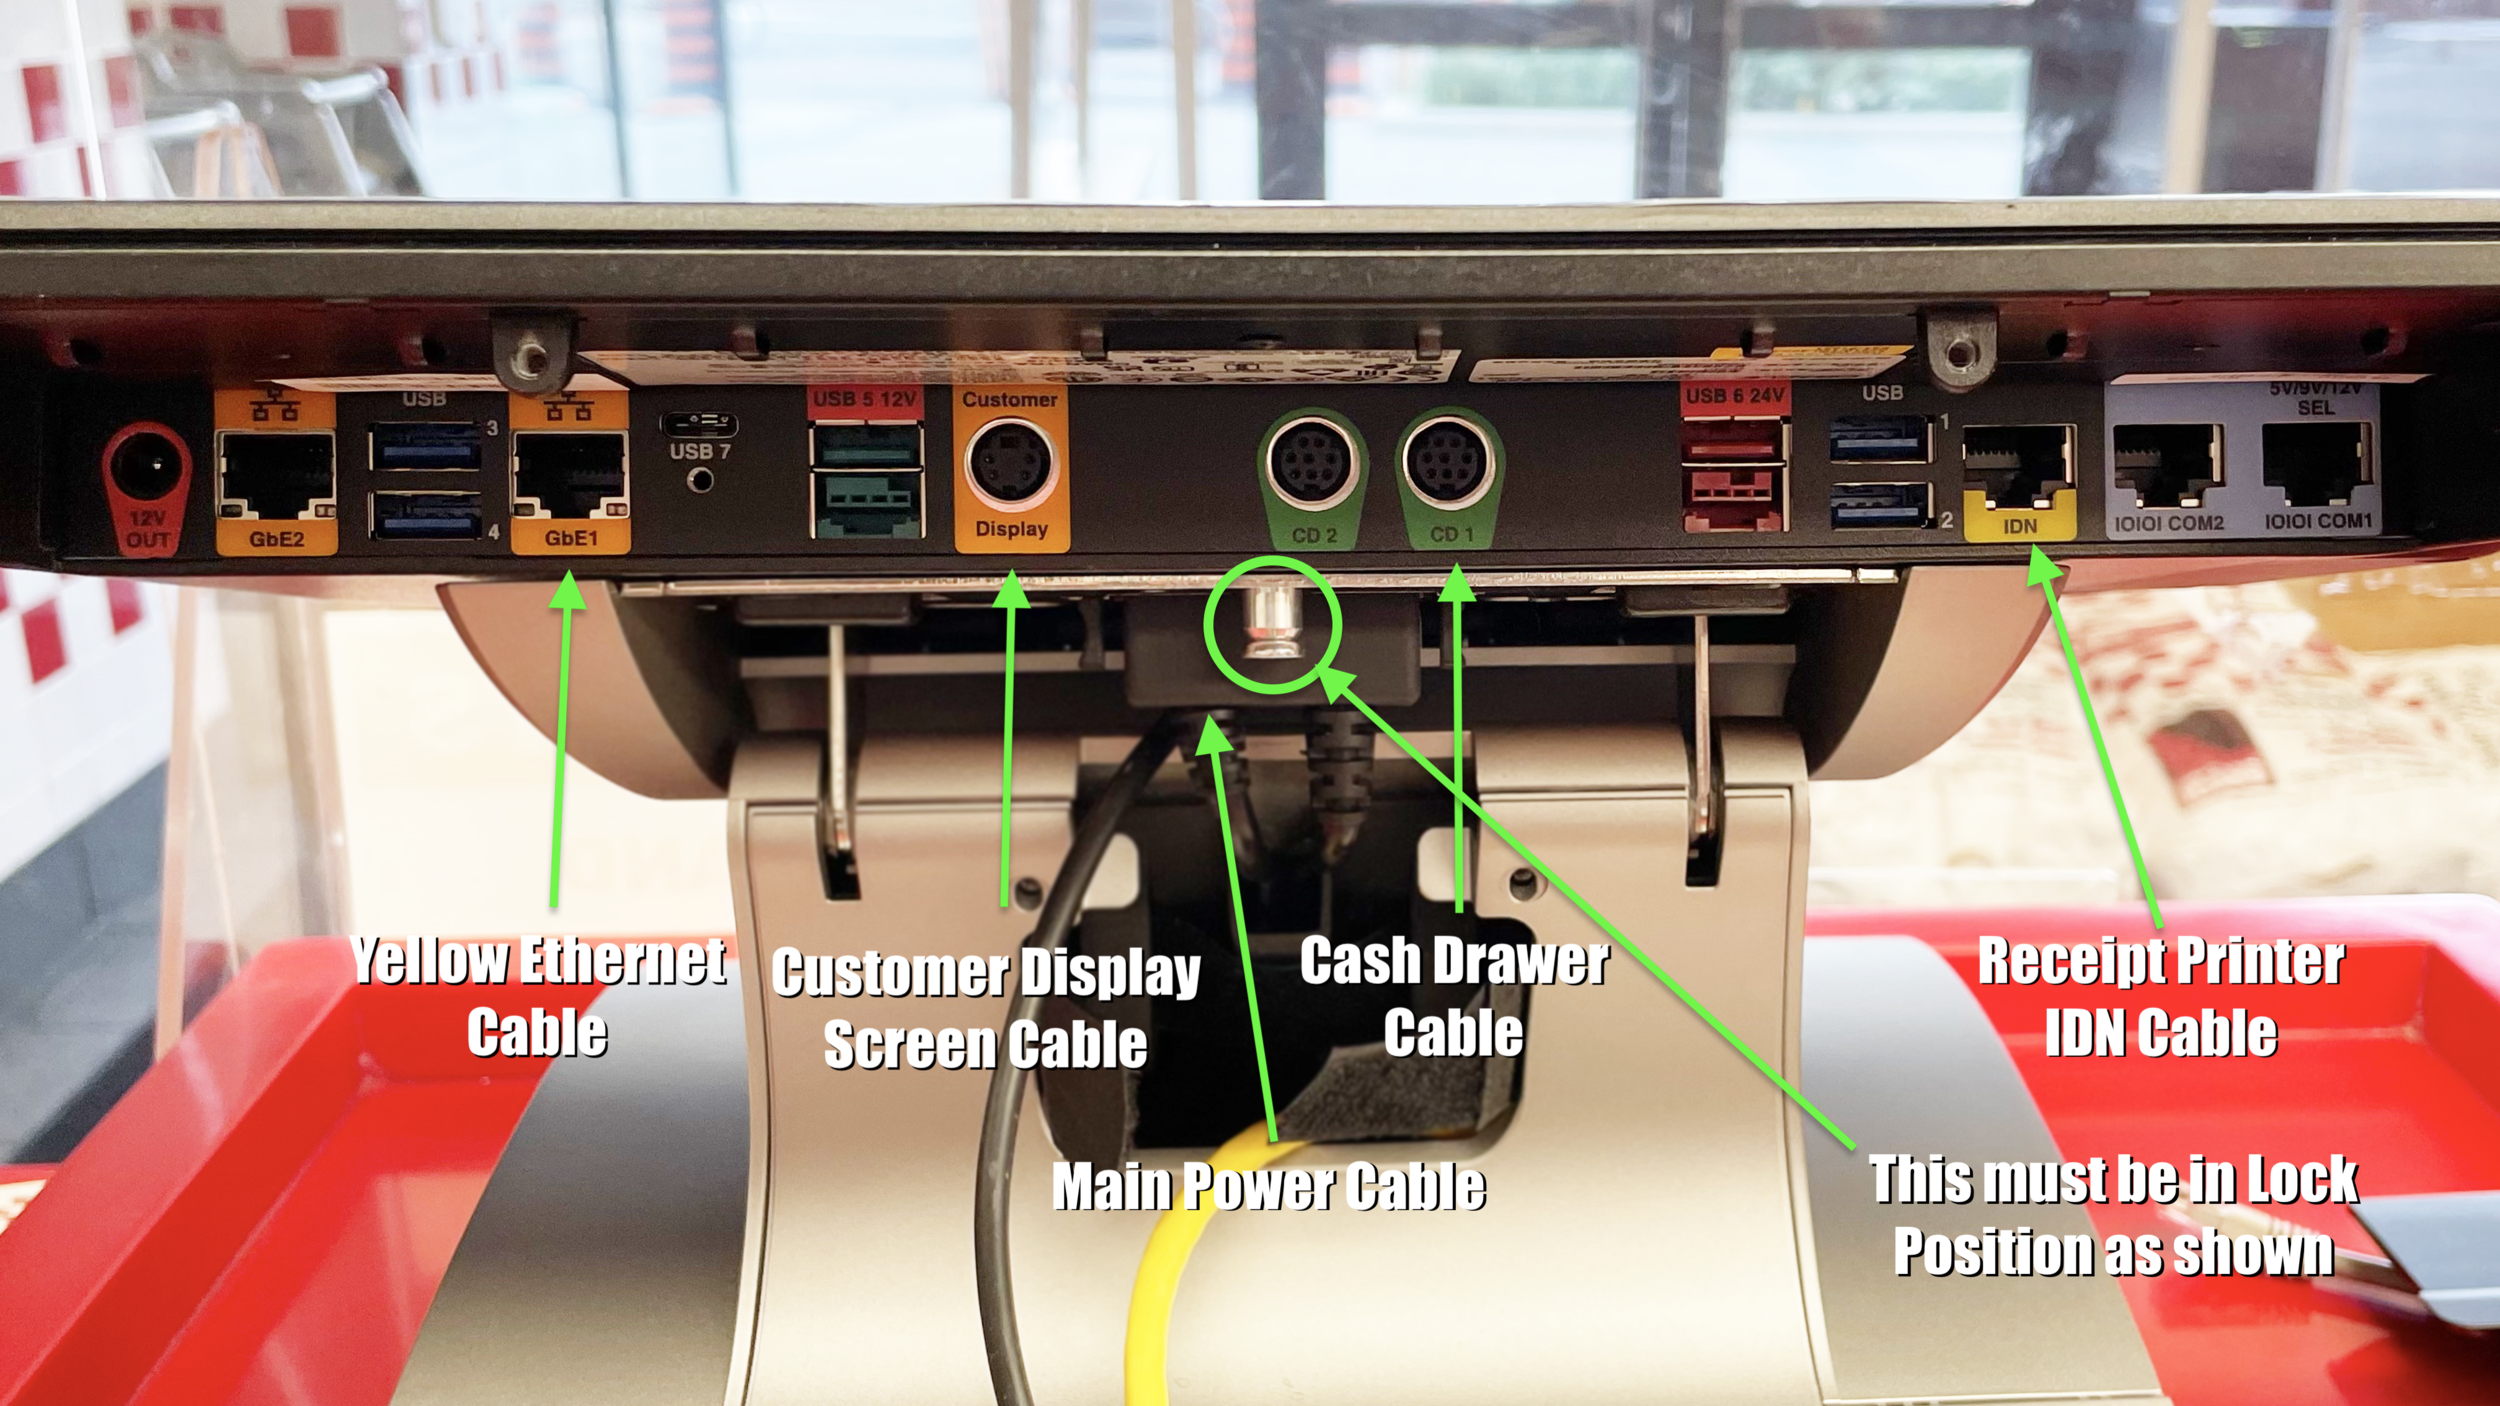
Get POS Stand Ready
i. Yellow Ethernet Cable
ii. Receipt Printer Adapter
iii. Main Power Cable on (HI-POT) must be powered by surge protector
iv. Customer Display Screen
v. Cash Drawer Cable
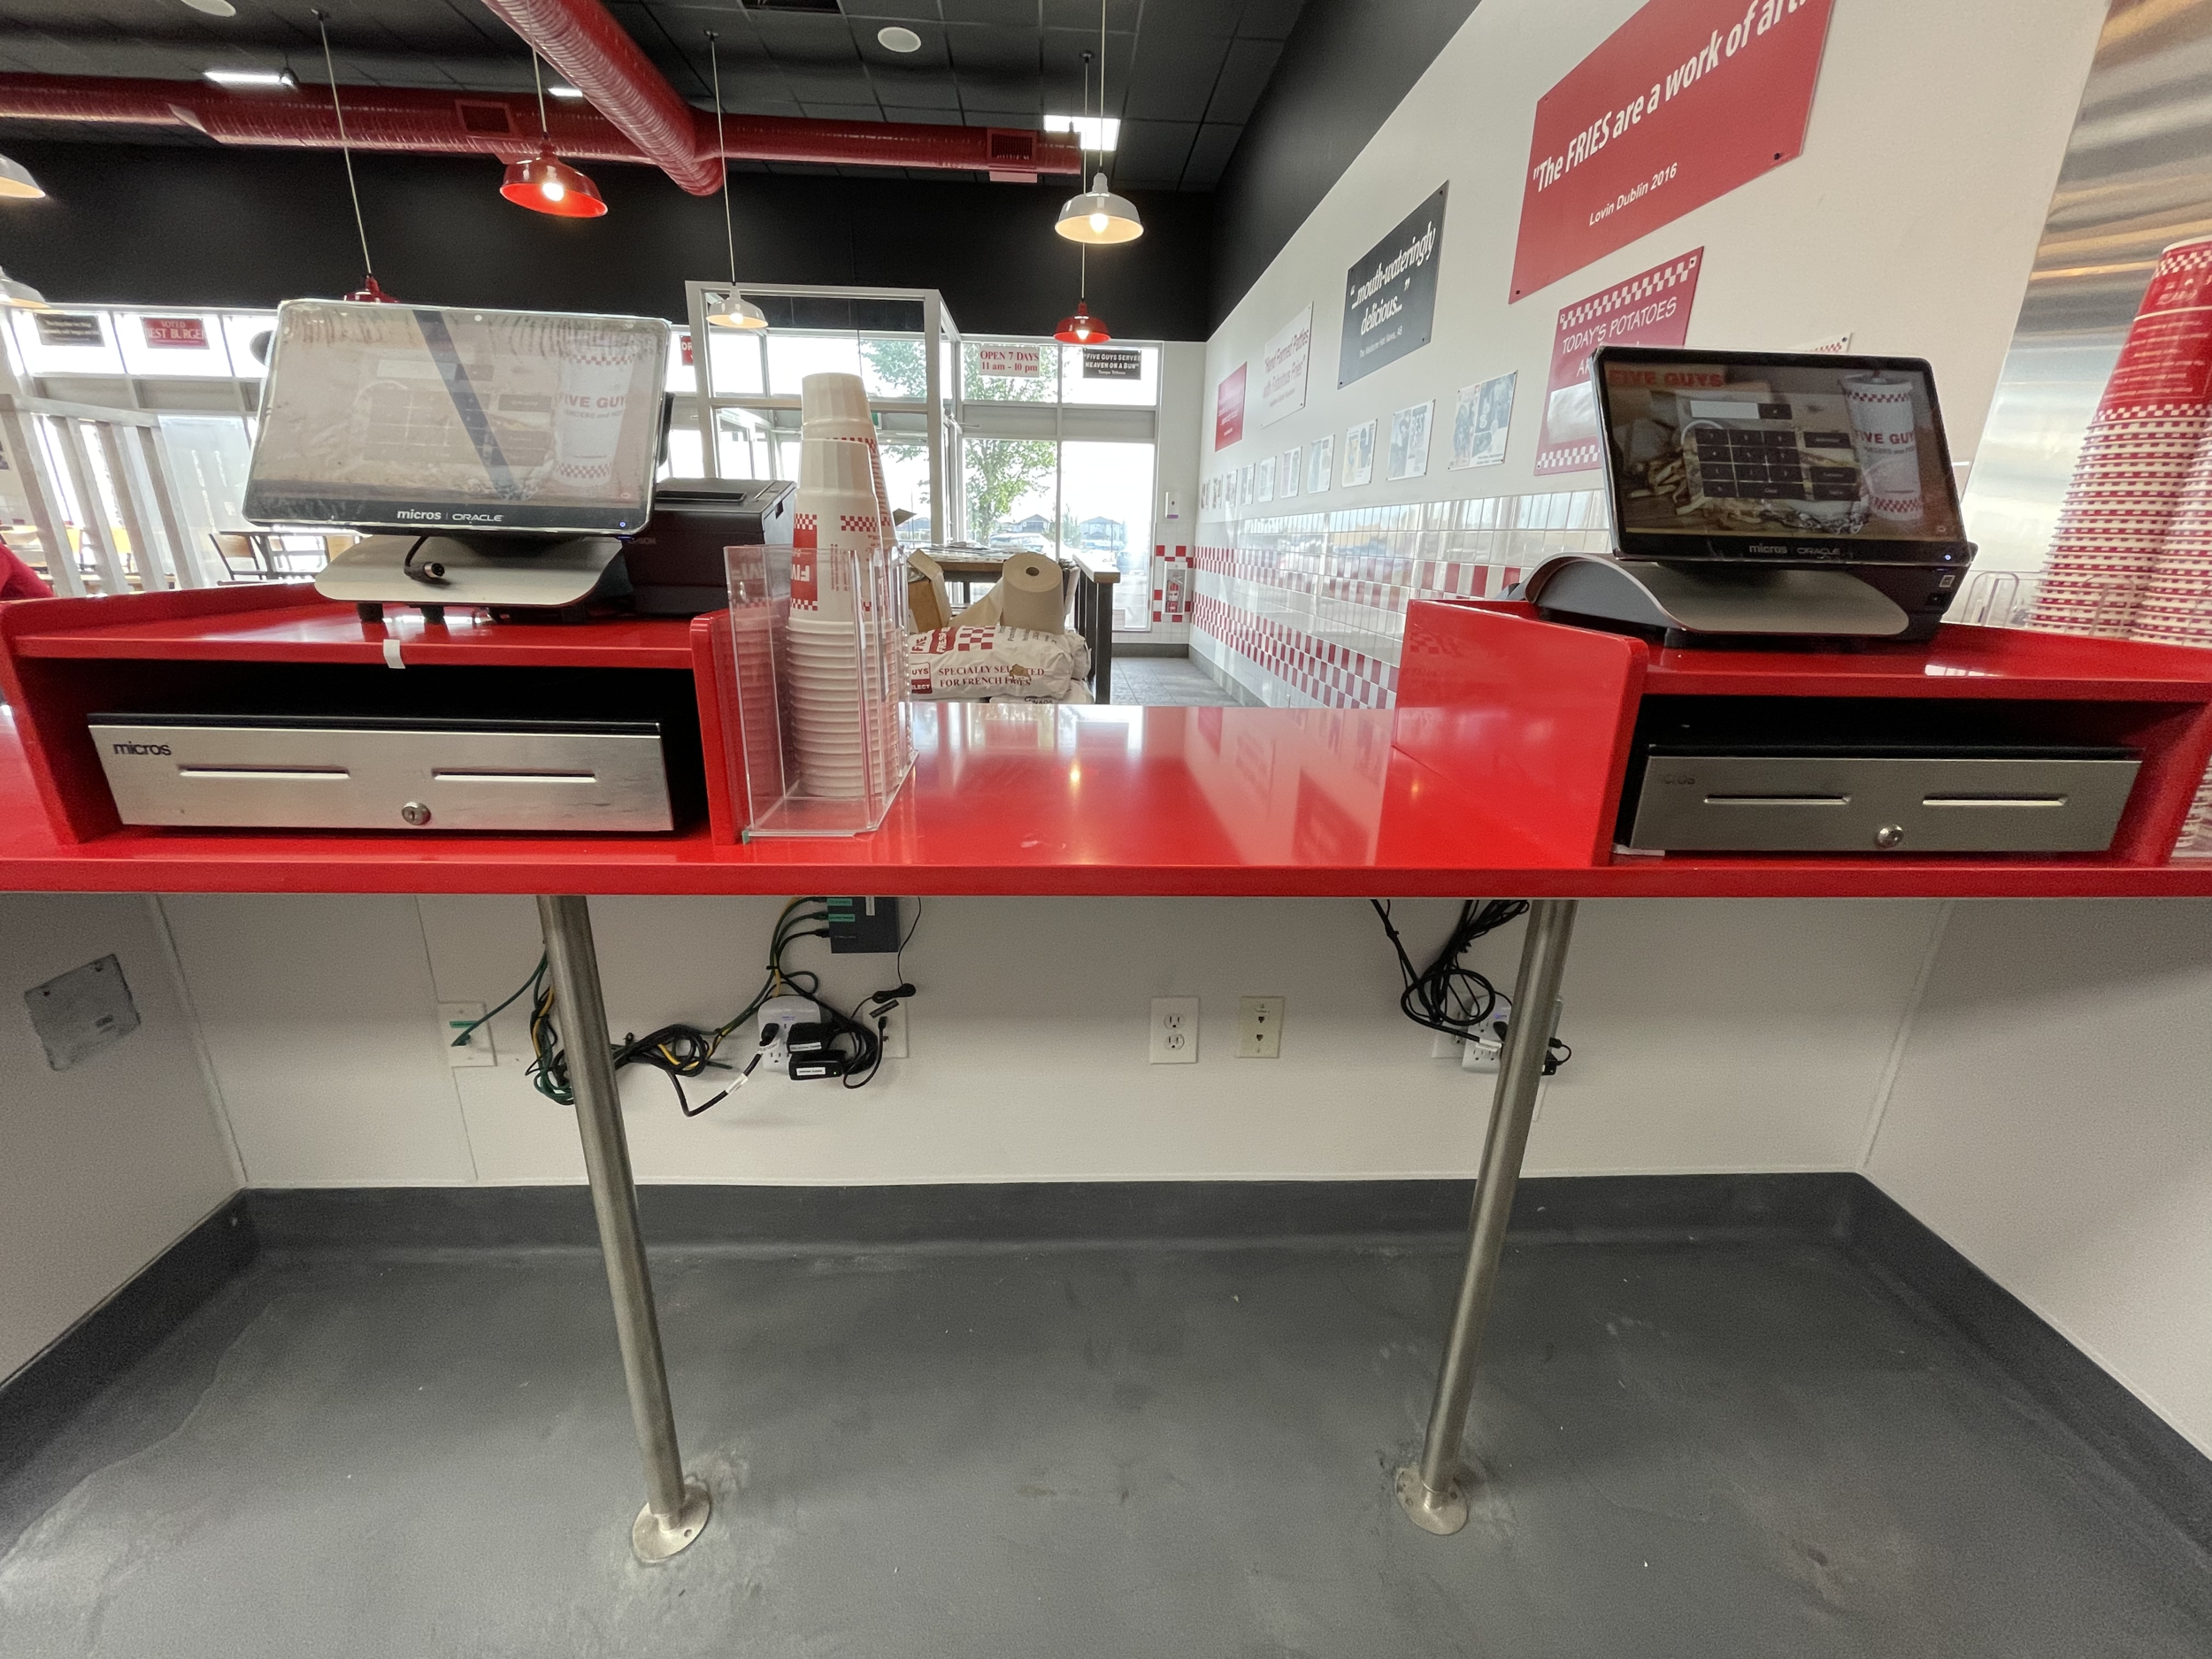
2. Identify Screen for POS1 and POS2
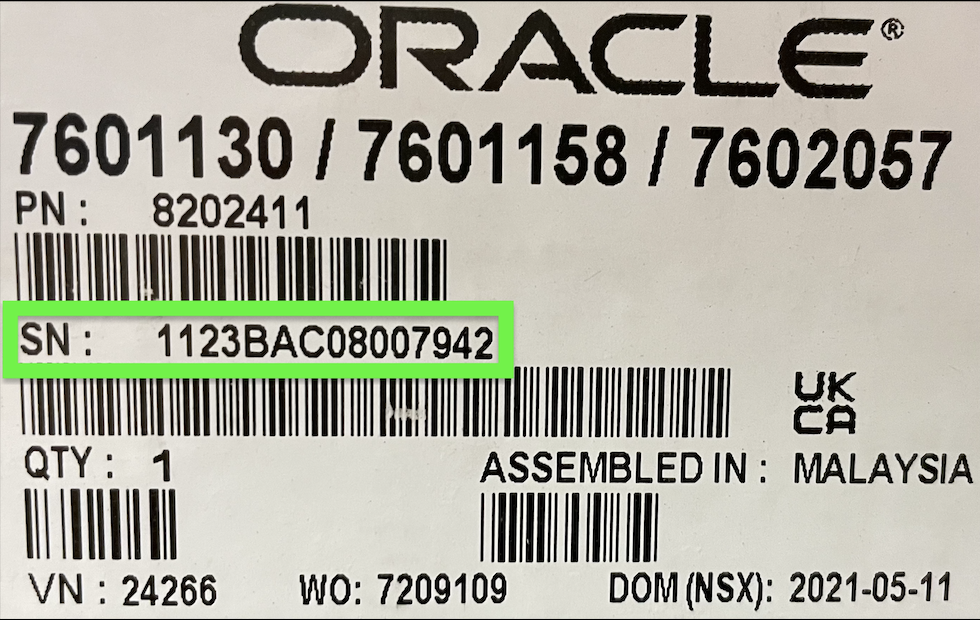
Identify matching serial numbers on boxes and packaging slip reference pictures on the right
i. POS 1 will be INTEL CORE i5 QUAD-CORE PROCESSOR
PN: 8202418 (you can find it on the sticker)
ii. POS 2 will be INTEL CELERON DUAL-CORE PROCESSOR
PN : 8202411 (you can find it on the sticker)
POS 2

Packaging Slip

POS 1
3 . Mount the screen and connect cables
i. Yellow Ethernet Cable – GbE1 port
ii. Customer Display screen – Display Port
iii. Main Power Cable - Black Socket
iv. Cash Drawer – CD1 Port
v. Receipt Printer – IDN Port (Only for IDN Receipt Printers)
4 . Turn on the POS 1 Display and Setup
(once setup is completed follow below steps)
Go to Control Panel ---> Network and Sharing Center ---> GbE1 (highlighted in blue) ---> Properties ---> Select Internet Protocol Version 4 (TCP/IPv4) ---> Properties ---> Select Use the following IP address
NOTE: (Below IP Information is for POS1 only)
IP address: 192.168.100.101
Subnet Mask: 255.255.255.0
Default Gateway: 192.168.100.1
Preferred DNS Server: 192.168.100.1
Alternate DNS Server: 8.8.8.8
Press OK to validate setting and then close the Ethernet Properties
5 . Installing Team Viewer Host
Start ---> Internet Explorer ---> Type in address bar get.teamviewer.com/cypressfivestar ---> Go ---> Run ---> Install Team Viewer Host
Once Team Viewer host is installed send a picture of “YOUR ID” and “PASSWORD” to Jeff Thompson
6 . Turn on the POS 2 Display and Setup
follow STEP 4 and 5 , must follow below IP information for POS2
NOTE: (Below IP Information is for POS2 only)
IP address: 192.168.100.102
Subnet Mask: 255.255.255.0
Default Gateway: 192.168.100.1
Preferred DNS Server: 192.168.100.1
Alternate DNS Server: 8.8.8.8
Press OK to validate setting and then close the Ethernet Properties
7. Once you have shared pictures of Team Viewer Host YOUR ID and PASSWORD for both POS to Jeff OR Zik, They will take over with further software installation
8 . Once POS software installation is completed, it is time for printer's setup
9 . Make sure each printer is connected to the network to their respective spots
(Power adapter must be connected and check each printer has power, after checking the power please turn off all printers so it will be easy to setup)
i. Receipt Printer – POS1
ii. Receipt Printer – POS2
iii. Kitchen Printer
iv. Milkshake Printer
10 . Turn on one Printer at a time and let Jeff OR Zik know which printer is ON, please wait for them until ask you to turn ON the next printer.
11. Once all Setup is complete Test some transactions as follows:
i. Debit/Credit on both POS to make sure Adyen PINPAD’s are working fine
ii. Debit/Credit Refund on both POS
iii. Orders with Milkshake to make sure both Kitchen and Milkshake printers are working fine